Enable Readable Stack Traces in Your Errors
A release version is a dynamic identifier that changes whenever you ship a new version of your code. When you give Sentry information about your releases, you unlock several features, including source mapping of minified JavaScript stack traces upon ingestion. Learn more in our Releases documentation. In this section, you will:
Use the Sentry CLI during the build process to update your Sentry account by:
- Creating a new release version
- Uploading the project's latest source maps (and associate them with the new release version)
Add the release version to the Sentry SDK configuration. This will associate any error captured by the SDK in our app to this specific release. Sentry will use the release's uploaded source maps to unminify the error's stack trace.
As part of the CI/CD workflow for this app demo, we're using a Makefile to handle the sentry-cli related tasks through make targets. If you're using a different code base, you can still apply the settings and commands described below to your specific setup or run them directly in a command-line shell as part of your build process. Learn more in our Command Line Interface documentation.
Step 1: Prepare the build environment
We use the Makefile in the frontend-monitoring project to handle Sentry related tasks using the sentry-cli. The CLI is already available through the project dependencies (see package.json) and requires several parameters to be available to run.
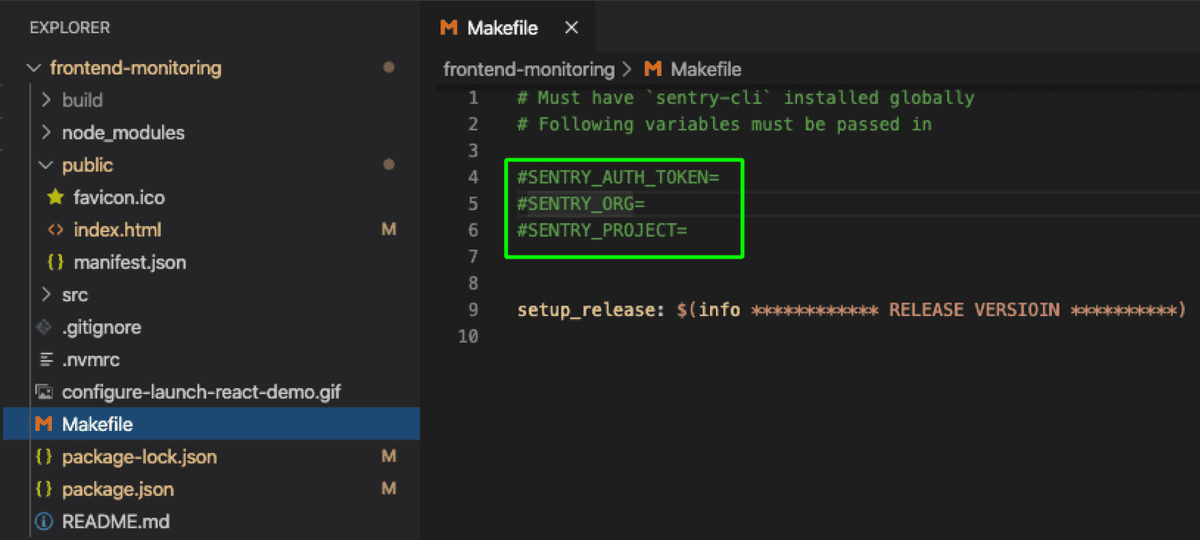
Open the
Makefile.Uncomment the commented environment variables
SENTRY_AUTH_TOKEN,SENTRY_ORG, andSENTRY_PROJECT(remove the leading#).To find the
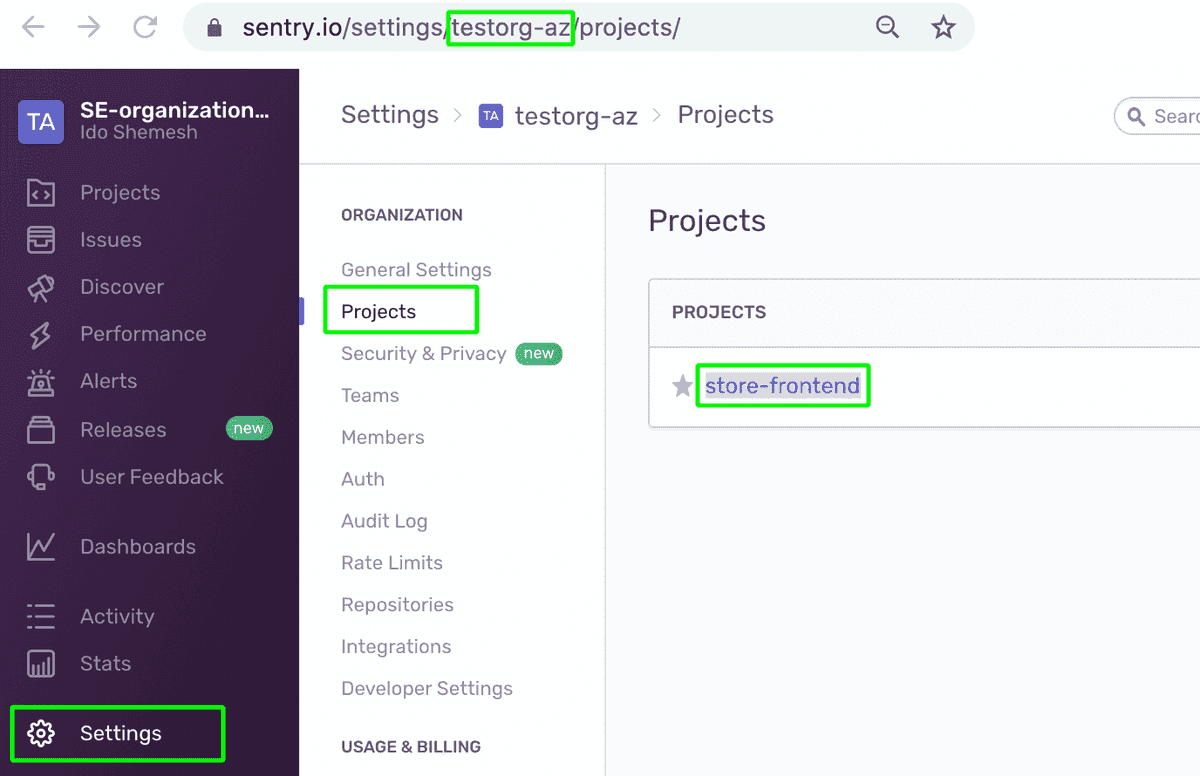
SENTRY_ORGandSENTRY_PROJECTvalues:Open your Sentry account and click Settings > Projects.
Your organization ID, or the
SENTRY_ORGvalue is part of the browser URL (for example, https://sentry.io/settings/**SENTRY_ORG**/projects/).The
SENTRY_PROJECTvalue is the name that appears in the project tile.Copy the values and paste them in the
Makefile.
To create a
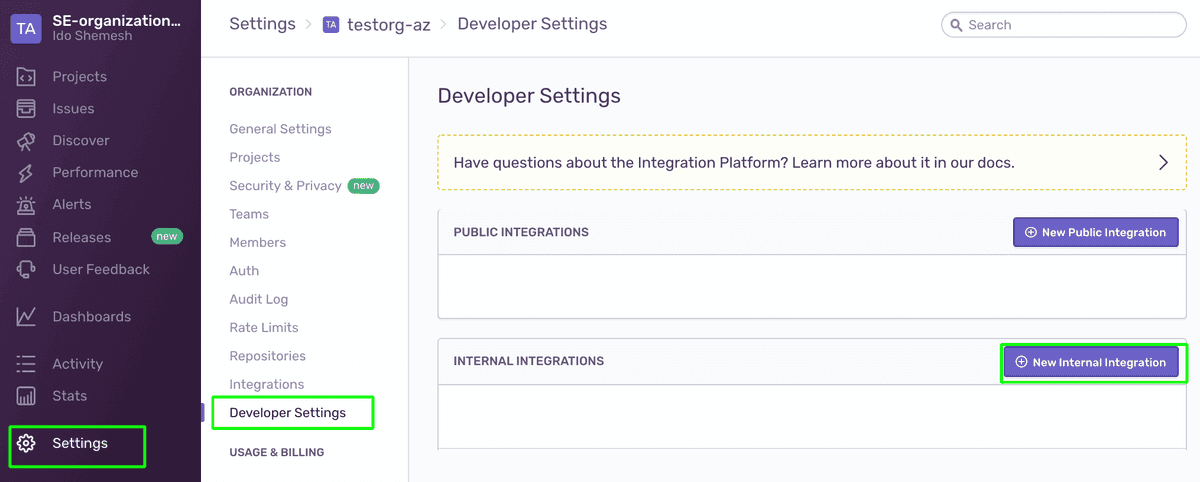
SENTRY_AUTH_TOKEN:Click "Developer Settings" in the left side panel to create a new integration and org-level auth
tokenIn search, a key-value pair or raw search term. Also, a value used for authorization..Click on "New Internal Integration".
Enter a name.
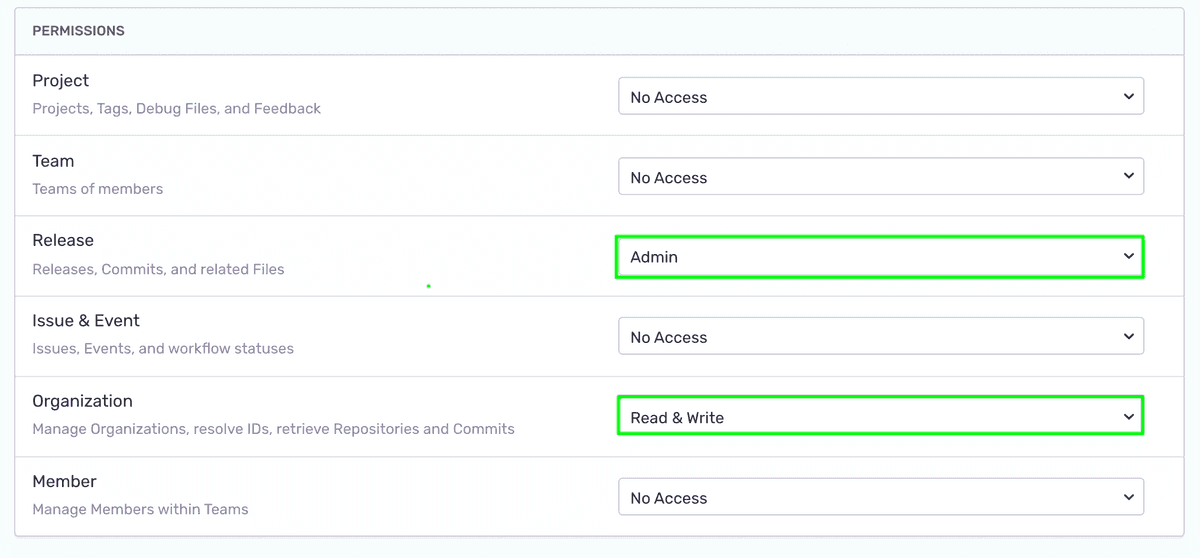
Under "Permissions" select "Admin" in the "Release" dropdown, and "Read & Write" in the "Organization" dropdown.
Click "Save Changes".
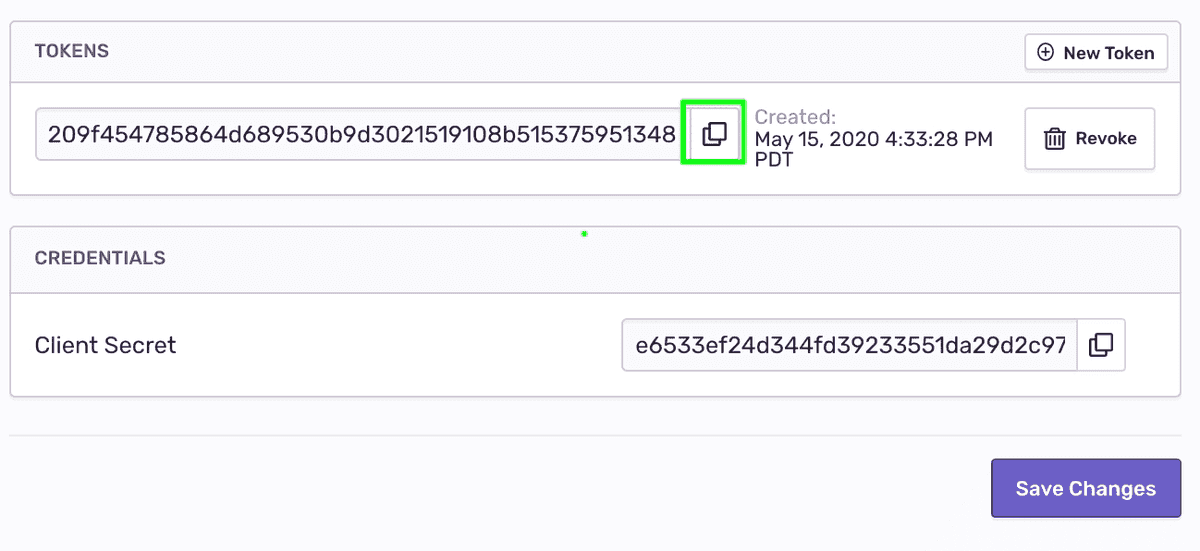
Once the save is confirmed, scroll down to the bottom of the page and copy the allocated token under "TOKENS".
Paste the token in the
Makefile.
The
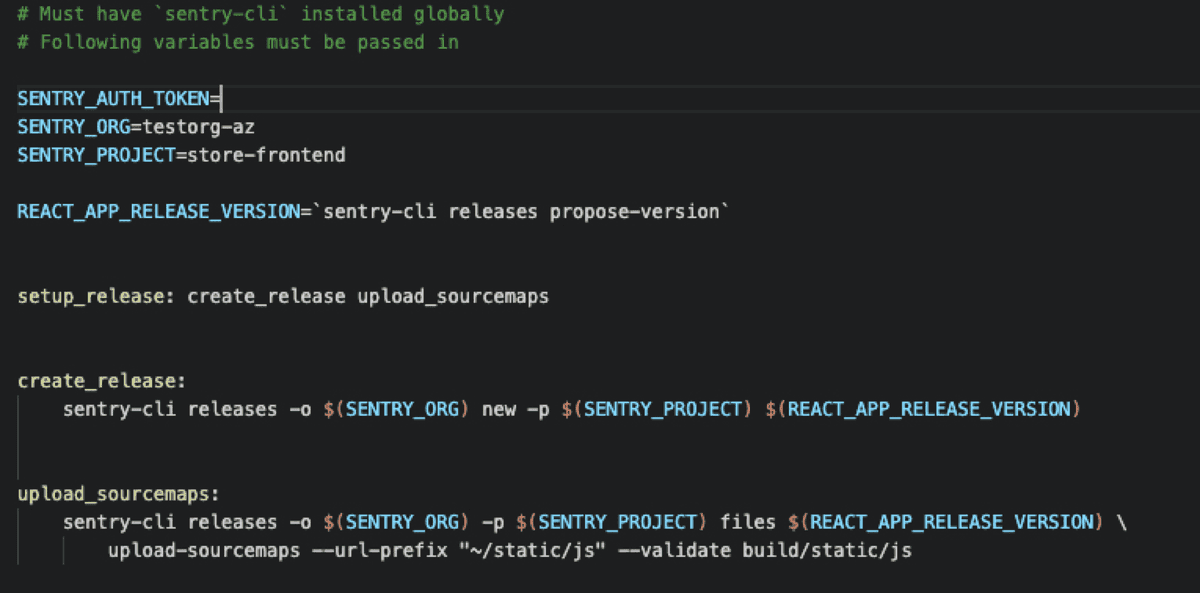
Makefileshould look like this:
Step 2: Create a release and upload source maps
Now we can invoke the sentry-cli to let Sentry know we have a new release, and then upload the project's source maps to it.
- You can set a custom release version to suit your naming conventions or let the Sentry CLI propose a version.
- To build the
frontend-monitoringproject, we use thereact-scriptspackage that also generates source maps under./build/static/js/.
In the
Makefile, add a new environment variable for the release version, using Sentry CLI to propose the version value:CopiedREACT_APP_RELEASE_VERSION=`sentry-cli releases propose-version`At the bottom of the
Makefile, paste the following targets using the Sentry CLI to:- Create a new release entity in your Sentry account
- Upload the project's source maps to the new release
Copiedcreate_release: sentry-cli releases -o $(SENTRY_ORG) new -p $(SENTRY_PROJECT) $(REACT_APP_RELEASE_VERSION) upload_sourcemaps: sentry-cli releases -o $(SENTRY_ORG) -p $(SENTRY_PROJECT) files $(REACT_APP_RELEASE_VERSION) \ upload-sourcemaps --url-prefix "~/static/js" --validate build/static/jsThe Makefile contains a
setup_releasetarget that is invoked from thepackage.jsonfile when you run$ npm run deployto build and run the project. We'll use this target to invoke all the release related tasks.Replace the existing
setup_releasewith:Copiedsetup_release: create_release upload_sourcemapsYour
Makefileshould look like this:Now that you've created a release version, you can associate any errors captured in your app to that release through the SDK.
Open the
index.htmlfile and add a new configuration option to the SDK. Assign the release version environment variable to thereleasekey.CopiedSentry.init({ dsn: "<YOUR DSN KEY>", release: "%REACT_APP_RELEASE_VERSION%", });Note that the release version environment variable is set in the
project.jsonduring build time and is injected into the generated markup.
Step 3: Try your changes — generate another error
If your terminal is still serving the demo app on localhost, click
^Cto shut down the local server.Build, deploy, and rerun the project by running:
Copied> npm run deployA
Makefileis generally unforgiving when it comes to indentation. If you're getting unexpected errors while running the above command, make sure thesentry-clicommands are properly prefixed with a tab.Look at the terminal log. Notice that the minified scripts and source maps were uploaded to the release version.
In your browser, make sure that the dev console is open and perform an "Empty Cache and Hard Reload" to make sure the updated code is being served.
Generate the error again by adding products to your cart and clicking "Checkout".
Check your Email for the alert about the new error and click "View on Sentry" to open the Issue Details page.
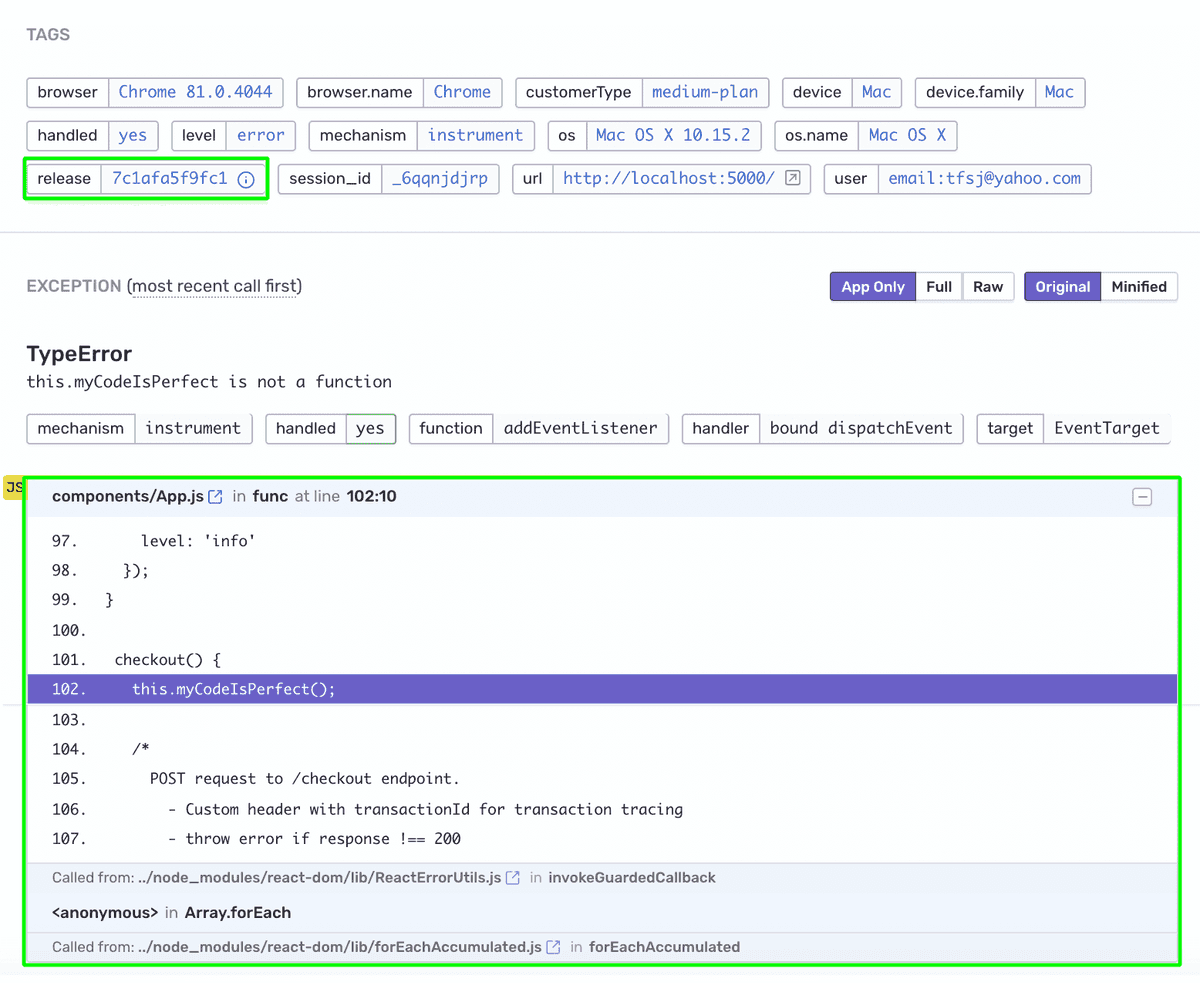
Notice that:
- The event is now tagged with the
Release ID. - The error stack trace is now un-minified and includes the file name, method name, line and column number, and source code context in every stack frame.
- The event is now tagged with the
Step 4: Explore the release
Creating a release version and uploading the source maps through the Sentry CLI, creates a Release entity in your Sentry account.
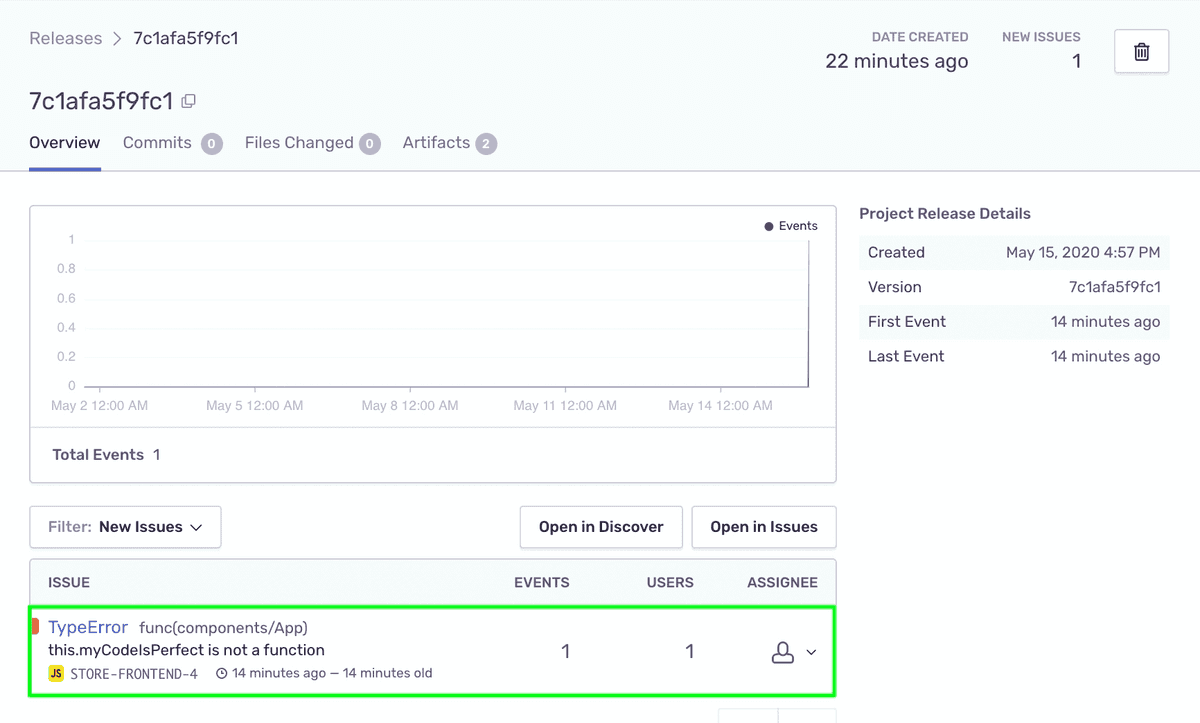
In sentry.io, click "Releases" in the left side panel. Notice that a new release version was created:
Click on the release and you'll see that the error in your app has been associated with this release and is listed as a "New Issue".
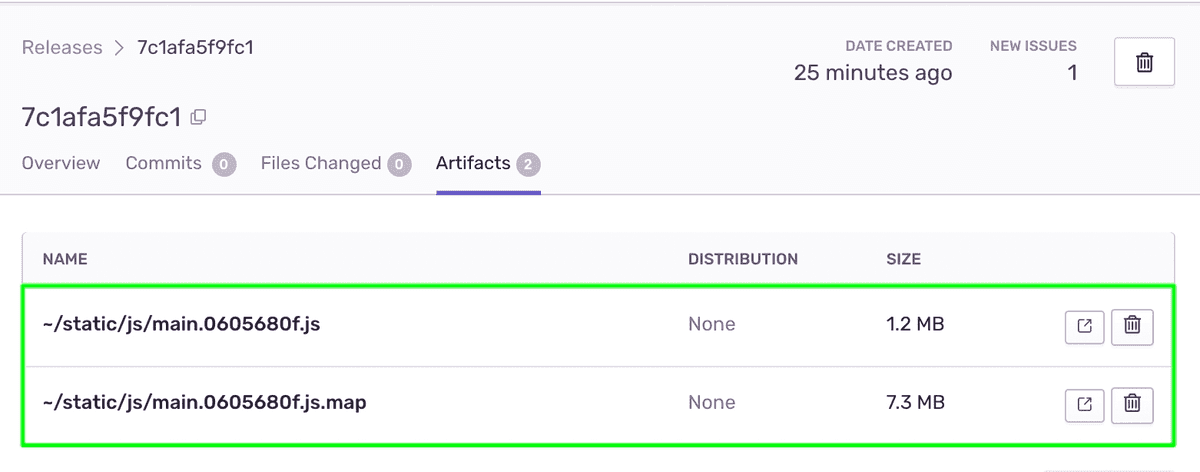
Click on the "Artifacts" tab, and notice the minified resources and source maps are available for this release and are used to source map stack traces.
Next
Now that we have all the information we need about the error and a clear stack trace, the next thing is to assign the right developer to handle it.
Our documentation is open source and available on GitHub. Your contributions are welcome, whether fixing a typo (drat!) to suggesting an update ("yeah, this would be better").
